Mass upload push ads, native ads and banners for your campaigns to save time.
Any advertiser or media buyer worth her or his salt knows that clicked traffic is what converts best by default. So part of every advertising strategy should be to use banners and native ads. It makes campaign optimization a breeze, especially if you’re using conversion tracking and advanced filtering techniques.
You should be able to upload a bunch of push ads, native ads and banners quickly to test the waters of these powerful campaign types. That’s why we have bulk uploading of creatives available for you!
To get started, just click the + sign next to where it says Creatives under the BUY TRAFFIC dropdown in the left sidebar of the user interface.

Bulk upload native ads
It’s a really simple process to mass-create native ads, thanks to our upload utility that was created with this goal in mind.
Step 1: Upload native ad images
You can upload images from your computer, import them via URL, or use images you’ve utilized before. Whatever you choose, keep in mind that native ads should ideally maintain a 4:3 aspect ratio and the minimum size for them is 400 pixels wide by 300 pixels tall.
It’s also important to note that native ad images must be plain photographs. They cannot contain any borders, graphics, watermarks, text, or similar. If they do, they will be rejected.
Pictures used for native ads must also be static PNG or JPEG images. It’s not possible to utilize animated GIFs.,
Step 2: Crop your images
If you didn’t upload images with the ideal aspect ratio of 4:3, then you may want to crop them so your finalized native ads will show the desired parts of your images. For this, simply click the crop tool icon for each native ad image you’d like to crop.
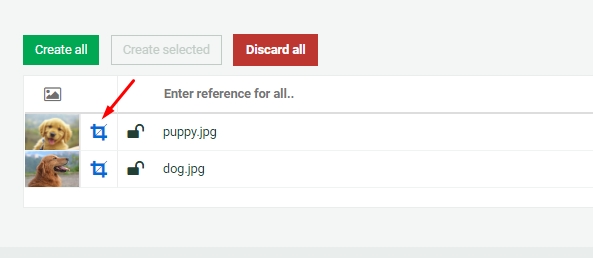
Step 3: Enter references
This will be an internal reference for each native ad to easily identify it. By typing in the top of the column where it says, “Enter reference for all…” you can make it the same for all native ads. Alternatively, you can give each an individual reference. It’s entirely up to you and this won’t be visible to users that view your native ads once your campaign is live.
Step 4: Enter titles
This will be visible to users that are shown your native ads, so ideally it would be 3-8 words for either all your ads (again, you can simply type at the top of the column to change all titles to the same thing), or you can of course type in individual ad titles as well.
Pro tip: Using the lock icons allows you to set a value for all native ads first, then lock some into this value, before mass-editing the others from the top again.
Step 5: Enter URLs
As in Step 4, here you can mass-assign URLs to the native ads you’re creating or you can edit them one by one too.
Step 6: Create native ads
When you’re done making changes, you can select certain native ads to create… or simply create them all. At the top, you’ll get a success message once all of them are created. Then you can use them to create native ad campaigns.

Bulk upload banners
Believe it or not, but mass uploading banners is even easier than creating native ads in bulk. You don’t need to worry about choosing any titles. And banner images can contain graphics, borders, watermarks, etc. Just make sure to read the guidelines on the banner upload page to make sure your submissions don’t get rejected.
The following are our accepted banner formats: 160×600, 300×600, 300×250, 728×90, 250×250, 200×200, 336×280, 120×600, 970×90, 468×60, 320×50, 320×100, 300×100 … And yes, you can upload multiple formats at the same time. For banners, you can also use animated GIFs.
If you read the steps for creating native ads in bulk above, you’re probably gonna be able to figure this out on your own. But let’s quickly cover the steps for mass uploading banner creatives anyhow.
Step 1: Upload banner images
The images you upload must adhere to one of the accepted banner formats listed above and also on the banner creation page. You can upload from your computer, import via URL, or use banners you’ve uploaded before.
Step 2: Enter references
These are internal references, for your eyes only. Visitors that are served your banner ads will not be shown these references. They should be utilized to easily identify banners in the creatives area of PlugRush’s user interface.
Step 3: Enter URLs
Choose the URLs you’d like to send visitors to when they click on your banners, after you’ve added them to a campaign.
Step 4: Create banners
When you’re happy with all the settings for your banners, you can choose to create the ones you select or simply hit the green ‘Create all’ button to mass generate banner ads in the system for all the ones you’ve uploaded.
Bulk upload push ads
Just as you would for banners and native ads, for push ads you’ll go to the Creatives area of the PlugRush user interface to get started.
Then just navigate to the PushAds tab and hit the green ‘Create Push Ad‘ button to begin the simple process of creating push ads.
Special considerations for Push Notification Ads:
- Two ad images (a main ad image and an icon) can be used for each push notification ad creative. The first one you upload is the main ad image and this should be at least 512x256px in size. Using a larger image and cropping it is ideal here.
- Static PNG and JPEG ad images can be used.
- For push ads, the images can contain graphics, borders and/or text (unlike native ads).
The Steps:
Creating push notification ad creatives in bulk is really easy.
- Upload your main ad images (minimum size: 512x256px)
- Upload icon images (ideal size: 192x192px)
- Choose titles (3-5 words)
- Choose descriptions (a sentence per is good here)
- Choose the URL the ad should send visitors to, when clicked
- Create your ads and use them for push ad campaigns

Something went wrong?
If something is missing (i.e. the URL) or incorrect (i.e. your title is too short), it will be marked red and the ad image icon will show a danger symbol.

Once you fix it, the font will be black again and the danger symbol will be gone for the ad image, meaning it’s ready to be created whenever you are!
Ready to scale?!
The favorite part of every media buyer’s job is scaling something that works to skyrocket ROI and bathe in $$$. And we have a cool little extra tool to help with that!
Consider this scenario: Your banners/natives are working for you and you’re ready to scale your campaigns, but you’ve lost the creatives on your computer/cloud? We’ve got you covered!
Amazing feature: Browse your previously used creatives and find the best converting for you. Simply add a title and URL, and you’re good to go!
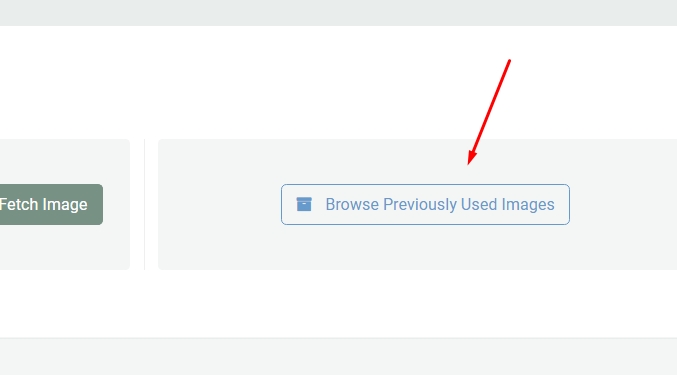
This sweet tool can be found both in the native ads creator, the push ads creator, and also the banner creator.
Thanks for reading!
We appreciate that you’ve taken the time to learn more about mass uploading creatives, namely native ads and banners, for your campaigns with us. If you have more questions, hit up our support team at your earliest convenience.


