Break down your ad campaign statistics with our custom filters tool for advertisers. Focus on the KPIs that are important to you in media buying.
Campaign Stats Overview 101
Before we delve into the more advanced world of custom filters in our campaign stats overview, let’s discuss a little bit what the campaign stats overview can be used for in general. The short answer: Everything.
The Slightly Longer Answer – Basic Usage of the Campaign Stats Overview as an Advertiser
Once you’ve navigated to the campaign stats overview you’ll have everything you need to optimize campaigns and edit them.
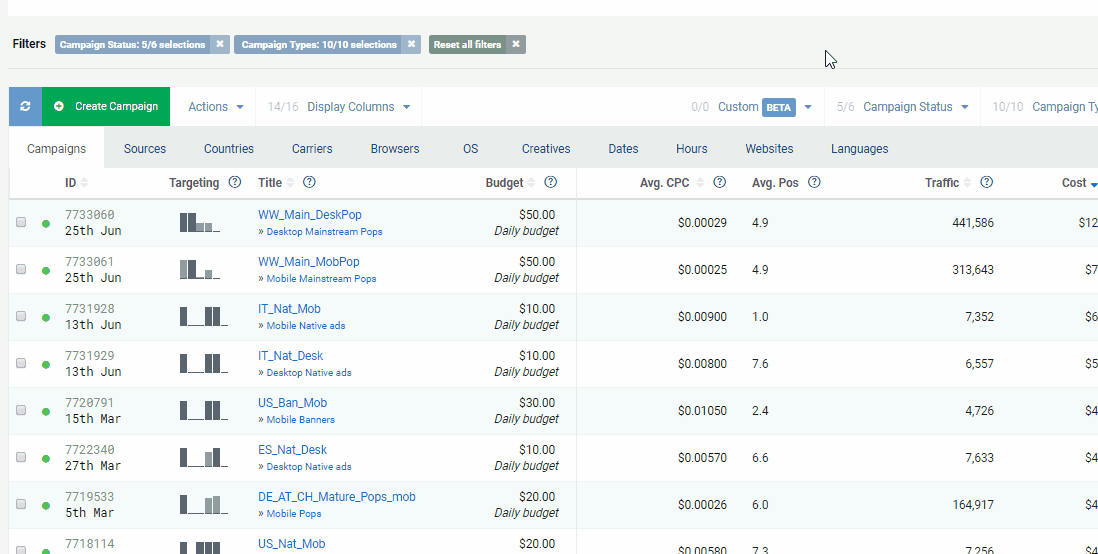
You can select which metrics to show in the graph at the top, choose a date range to display stats for at the top right, display columns of your choosing, select the campaign types or statuses you want to show, and much more. We encourage you to play around with it a bit!
Heck, you can even break down your stats by a single campaign simply by clicking its name. This is extremely important to do, when you want to view stats only for one campaign. I.e. when you’re looking to optimize it with the help of conversion tracking or our Sources feature.
Once you’ve made your basic selection and have selected a campaign to analyze, by clicking on its name, you can then browse through the various stats tabs like Sources, Carriers, Countries, Browsers, etc. to analyze the traffic you’ve received.
Helpful Tip: Each campaign listed in the campaign overview has an ‘Actions’ icon in the very right column, which looks like a blue gear icon. Click on that to select actions like starting, pausing or editing the given campaign.
Go Advanced with Custom Filters
Now that we’ve outlined the basics of the PlugRush campaign stats overview a bit, it’s time to cover our main topic of this guide: Custom Filters
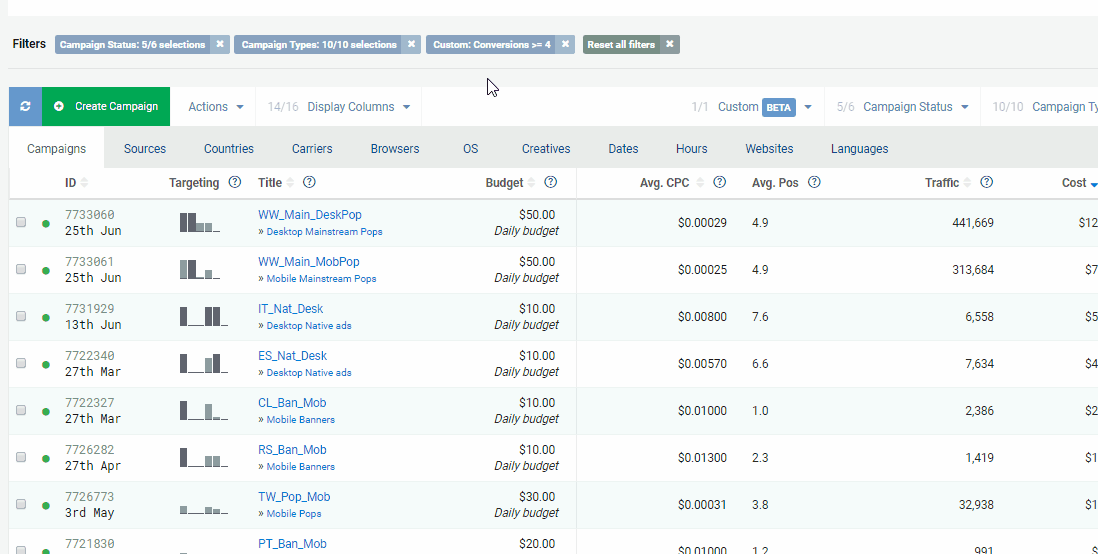
The use of PlugRush’s Custom Filters allows you to break down the campaign stats overview quickly in one or multiple meaningful ways. F.ex. you can apply a filter to see only campaigns that have converted more than X amount of times.
Create Custom Filters
The custom filter creation dropdown menu is located at the top of the campaign overview. The GIF below illustrates how to create a custom filter. As mentioned, you can apply one or multiple custom filters to the campaign index.
There is additionally an option to apply custom filters by default. This means that, if you select this option, the next time you come to the campaign overview your default custom filters will already be applied.
Remove Custom Filters
Existing custom filters can be edited or removed under the custom filters dropdown menu.
In case you want to only clear a custom filter you’ve applied from being active on the campaign stats overview, you can do so with one mouse click.
In the following animated GIF, we illustrate quickly how this is done, using the custom filter we created above as an example.
Custom Filters Can Be Used to Create Automated Rules to Auto-Optimize
Once you’ve learned how to use Custom Filters, you’ve completed a very important step toward being able to use Automated Rules, which can optimize your advertising campaigns with PlugRush automatically. On average, this will save a media buyer roughly 90% of time spent on campaign optimization.

That’s a massive amount of time, when you consider most media buyers spend basically all day optimizing ad campaigns they’ve got running. And this cool tool does it for you. Amazing, right? You can learn more about Automated Rules in our guide for them here.
Thanks for reading
We hope this guide to advanced stats management has been helpful and informative. We encourage all of our advertisers to take advantage of the powerful tool that is custom filters. If you have any questions about this topic or anything else PlugRush related, please reach out to our amazing support team.


