This guide covers the basics of creating an ad campaign at PlugRush. It will take you less than 10 minutes to read and you’ll leave understanding how to create campaigns.
What this guide will cover
- How to create ad campaigns at PlugRush
- Nothing else, but don’t worry… we have many other guides for that
Prep: Upload creatives
Skip this step, if you’re not going to buy display ad traffic (push ads, banners, or native ads).
If you have trouble figuring out how, please read the full guide about uploading creatives.
Create a campaign
Of course we’ll share a bit more details, even in a quick guide like this one. Start by going to the campaign creator.
Basics
- Give your campaign a name. We recommend using a naming system that enables you to easily locate it later. Quick example: A mobile pop campaign targeting Android and the carrier TIM in Italy for Dating Offer #3 might be named: mp_andr_it_tim_dating3
- Choose if you want to target mainstream or adult traffic. Important: You cannot use adult landing pages for mainstream traffic.
- Choose a delivery method (how your traffic will be sent). You can target desktop computers or mobile devices and then select the ad format (f.ex. push ads or banners).
Content
If, under ‘Basics’, you’ve selected a display ad format (Push Ads, Banners or NativeAds), then a new section in the campaign creator will magically appear. Here, you can assign ad creatives to your campaign. You can choose from the ones you uploaded in the prep phase.
If you’re buying pop traffic, you can just put your campaign URL there. It’s where we will send your traffic.
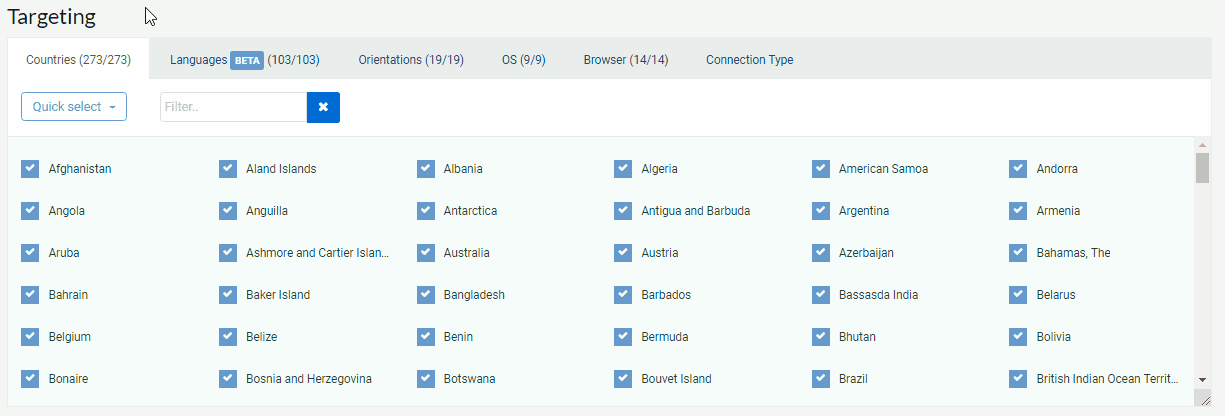
Targeting
- Select countries, languages, orientations/categories, operating systems (OS) and browsers you want to target.
- If you chose a mobile traffic type, you can select if you want to allow, disallow, or only buy webview traffic under the ‘Browsers’ tab. Webviews are browsers implemented into mobile apps.
- Under ‘Connection Type’, you’ve got a few options. If you don’t know what the options mean, just leave the default settings.
- If you want to buy carrier traffic using our built-in carrier targeting, you should select ‘Mobile network traffic(3G/4G)’ under ‘Connection Type’ and then another tab called ‘Carriers’ will appear. There you can select which carriers you want to target. Pro Tip: You can also use IP range whitelists to target mobile operators (carriers) instead.
Options
- Frequency capping lets you choose how often we can send your campaign a given visitor within a 24 hour period. Most campaigns are left at the default 1 in 24h.
- The schedule feature allows you to run your ad campaign only on certain days and/or during certain hours in a timezone of your choosing. By default, campaigns are set to be able to run all day.
- Retargeting allows you to implement a tracking pixel script on various pages throughout your conversion funnel(s) in order to retarget specific visitors only with a given campaign. Please note that retargeting is an advanced feature that only makes sense to use, if you have full control over pages you send visitors to with your ad campaigns. Learn more about it here.
- Applying whitelists means your campaign will ONLY buy traffic from the sources or IP ranges you’ve added to your whitelist.
- Applying blacklists means the things in your blacklists will be blocked from the campaign.
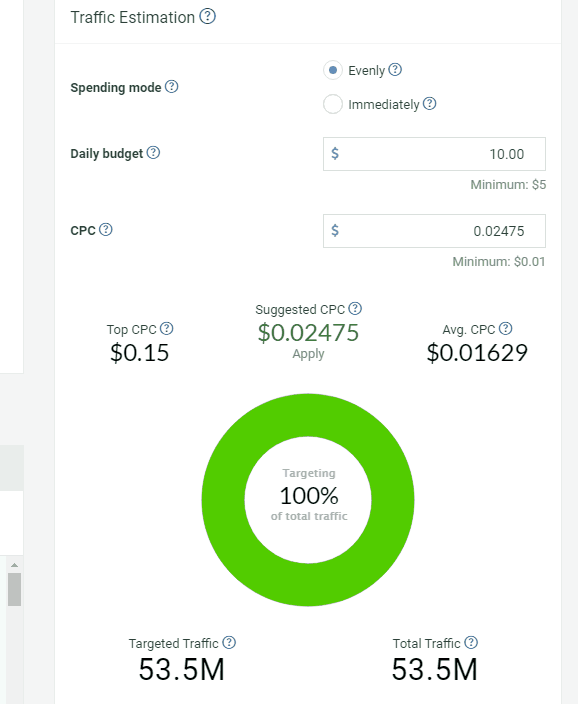
Traffic Estimation
In the top right of the campaign creator, you can select the spending mode of your campaign. Choose if you want your traffic to come evenly (spread out throughout the day) or immediately (as quickly as possible).
You can also choose the daily budget of your campaign. This is the maximum amount it will spend each day, until you pause it.
Finally, you can set the Cost Per Click (CPC) bid for your campaign. The minimum is shown based on the delivery method and targeting options you’ve selected.
Your bid is how much you pay per visitor that we send to your campaign. On display ad traffic (banners, native ads and push traffic), it’s per click on your ads. For pops, it’s per popup that a visitor is sent to your landing page through.
The estimation tool will show how much traffic your campaign is targeting out of the total amount of traffic available for the ad format (i.e. mobile push ads) you’ve chosen. Please check our inventory & prices page for a broader overview broken down by ad formats and countries.
Also shown are the top current CPC bid in our system for the traffic you’re targeting, a suggested starting CPC bid for your campaign, and the average CPC bid we’re seeing for traffic you’re targeting with your ad campaign.
Important: It’s imperative that you monitor your campaign’s win rate % once it runs to see if you’re winning a high percentage of the traffic available to your campaign, or if you should consider increasing your bid in order to win more. Learn more about win rates here.
Finished?
Once you’ve made all the selections you want in the campaign creator, all that’s left to do is hit the big green ‘Create Campaign’ button at the bottom.
After this, your campaign will be pending review by our campaign admins. Generally, it will be reviewed within a few hours.
Editing an existing campaign
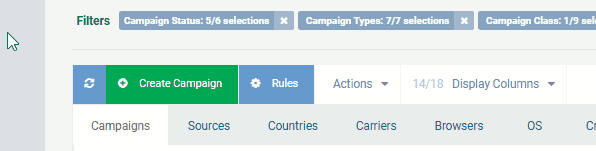
If you need to make targeting changes to a campaign that you already created, navigate to the Campaigns page in the user interface.
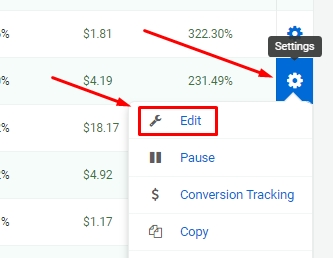
In the far right column, click the settings icon (looks like a blue gear wheel) for the campaign you want to edit. Finally, select ‘Edit’. This will open the campaign editor, which is basically identical to the campaign creator.
Time is up!
If this took you longer than 10 minutes to read, you need to read faster. Hit up our support team if you have any questions. They respond to tickets in under two hours on average.


